
2 Installing NetConnect
Remember to use your backup disks of NetConnect when installing.
If you are using the floppy disk of NetConnect, insert NetConnect disk one and double-click
the "Install NetConnect" icon. If you are using the CD version insert the CD as normal and
double-click on the CD icon and the "Install NetConnect" icon will appear.

When you click this icon a NetConnect install GUI will appear on your Workbench. This GUI will guide you through the process of installation.
Before installation begins, you will be asked to specify your knowledge of the Amiga:
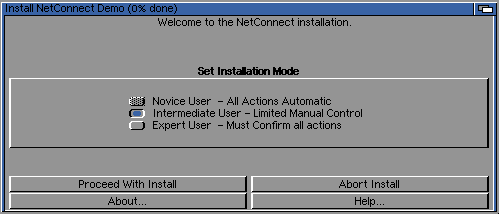
| Mode | Installation |
|---|---|
| Intermediate | The process of installation is nearly automatic. You only need to select where you want to install NetConnect, AmiTCP, MUI and then configure the AmiTCP GUI |
| Expert | Same as Intermediate mode except you are asked some extra question about installation and further options will be presented to the "expert" user. |
Our advice is to select Intermediate mode. Most of the questions asked in Expert mode are
trivial and do not alter your use of NetConnect. In fact, we would even recommend expert
users to use the Intermediate installation.
Click "proceed" to start the installation.
Insert your name, organisation (if applicable) and serial number into the correct boxes when asked.
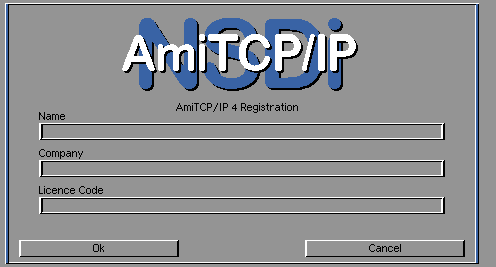
If you find that you are presented with "bad serial code" (or something similar) please compare your unique serial code on your registration card to the one you inserted into the "Licence Code" box.
Many people insert this information quickly but find they mis-read their serial code information - which needs to be inserted correctly.
You will find your unique serial code on the registration card your received with your software.
The installer will ask you where you want to install NetConnect. Make sure the hard drive partition you want to install NetConnect contains more than 8MB of free space.
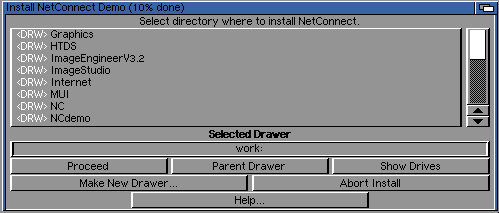
A NetConnect drawer will be created on your hard drive. We recommend that you install to your work: or hd1: partition (ie. with a lot of space).
NetConnect will be installed to this hard drive partition and copy some essential files to Workbench where needed.
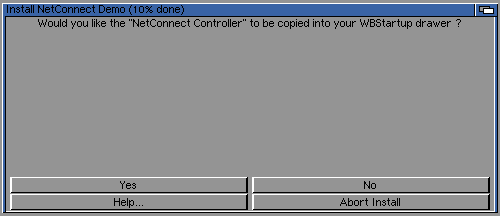
This option is asked to expert users and is recommended. The NetConnect main exceutable (which is quite small incidentally) will be copied to your WBStartup drawer which means that the NetConnect icon bar is started when you boot your machine.
The NetConnect icon bar is essential to launch and run the NetConnect modules.
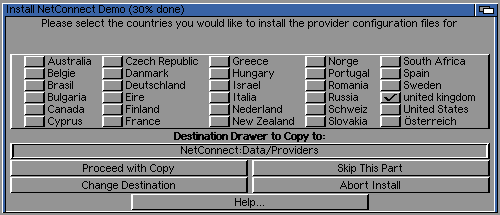
Select your country of residence. The example image shows "United Kingdom" selected if a user lived in this country.
This is needed so the installer knows which "Provider Profile" files to copy for your country. You can, of course, choose more than one country.
For users that selected the intermediate option, the installer will now ask you where you want to install AmiTCP.
Our advice is to install AmiTCP within the NetConnect drawer - this is the default option.
Go to the previous, next, chapter, table of contents.